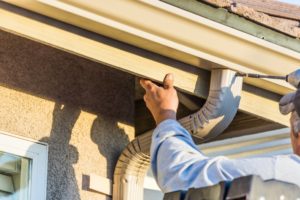
After binge watching episodes of Fixer Upper on HGTV or even doing a few DIY projects, you may be in the mood to try to tackle other home projects on your own. In some cases, this confidence and motivation can be a good thing! In others, however, the results can resemble Tim Taylor’s on Home Improvement—with injury, frustration, exhaustion, and/or sub-par work.
When it comes to your gutters, should you even attempt to install them yourself? Do you always have to call in a pro? In today’s blog, learn when it’s appropriate to potentially take on a gutter installation project and when turning to a professional is the smarter choice.
Try on Your Own
The thought of gutter installation can seem daunting even to an intermediate-level DIYer, but for a small, low section, it is feasible for most homeowners to take it on without professional help. In fact, installing a 20-foot section of gutters usually takes about an hour. You should consider asking a family member or friend to help you make sure everything is done correctly, but you may be capable of doing the installation alone.
When to Call in the Pros
If you are not experienced with home repairs, it’s better to hire a professional team. Or if a longer section or the whole house needs new gutters, it’s time to call in experienced experts to complete the larger scale project. With a multi-person, experienced crew, they can whip out the installation significantly faster than you can. Plus, if you have a two-story home or higher areas of your house that need gutters, professional installers will have the tall ladders and experience required to reach these heights safely.
Steps for Installation
Before starting, make sure you have all the materials you’ll need, including a hand drill; K-style gutter, joint connectors, straps, and end caps; gutter sealant; downspouts and the U brackets that go with them; and extra fascia board, if necessary. Still think you can do the installation yourself? Learn step by step what you need to do:
- Step 1: Remove the old gutters.
- Step 2: Replace the fascia if it’s damaged or rotting.
- Step 3: Connect the 10-foot sections of gutter together using a joint connector.
- Step 4: On the fascia, mark important lines and meeting points, such as the gutter level and gutter slope lines and the downspout location.
- Step 5: Mark and then cut out the drop outlet area in the gutters, where the drop outlet will then be attached and sealed.
- Step 6: Put together the K-style brackets and attach them to the gutters, and then use the brackets to attach the gutters to the fascia.
- Step 7: Finally, attach the downspout brackets and then the downspout, adding any extensions that are needed. Make sure all connections and joints are properly sealed.
If this process seems like something within your ability to carry out for a short bit of the gutter, then you may consider doing it by yourself. If you have any doubts, however, there certainly is no shame in reaching out to professionals to take care of the project for you. Don’t be Tim Taylor and take on more than you can handle. Make sure the job is done correctly so that your home is well protected against moisture.
About Platinum Gutters
Platinum Gutters has been serving the Dallas-Fort Worth area since 2008. Platinum Gutters has received numerous awards for service and quality! Karl and Marjorie Pickens, who have owned and operated the business from the beginning, have assembled a team of experienced professionals who take safety seriously and protect the crew, home, and the homeowner. If you need your gutters replaced, reach out to us for a free, in-person quote.

